CultureAI uses direct application to ensure delivery of simulated phishing emails. Due to the nature of these emails, they will often be blocked by Microsoft or other email tooling. Direct application is a process that allows our simulated phishing emails to be sent directly to your email servers, bypassing any other infrastructure that you have in place.
Note - in order for direct send to work, your domain needs to match a domain in the domain scanning section of the CultureAI platform, please reach out to success@culture.ai to get your domain added to your scanning section if required.
The high level steps are as follows:
- Configuring a connector to allow mail directly from CultureAI.
- Setting up Microsoft advanced phishing delivery.
- Set up a spam rule to ensure delivery of other CultureAI emails.
- Add your MX record into CultureAI to turn on direct send.
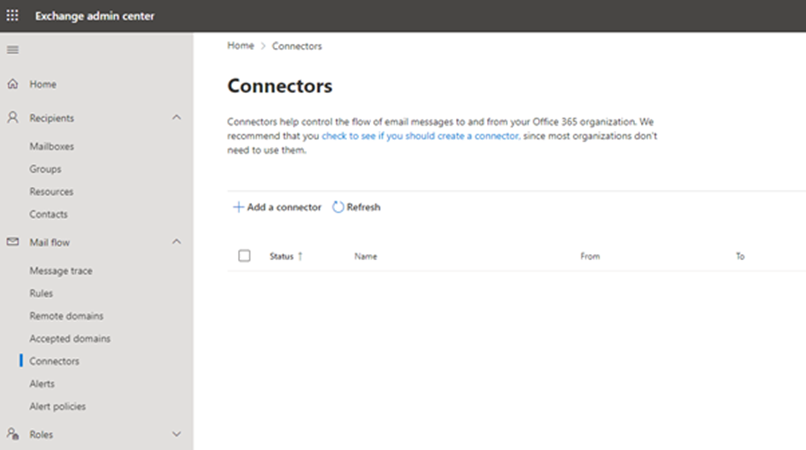
Microsoft 365 connector
- Head to your Microsoft Admin Connectors panel
- Select “Add a connector”
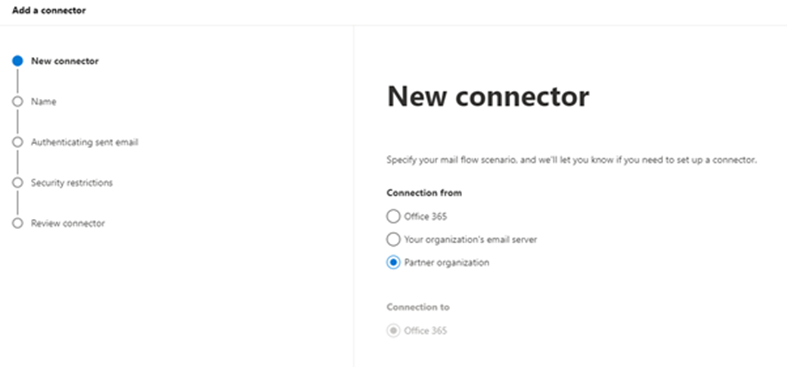
- Select “Partner organisation”
- Add a name and description:
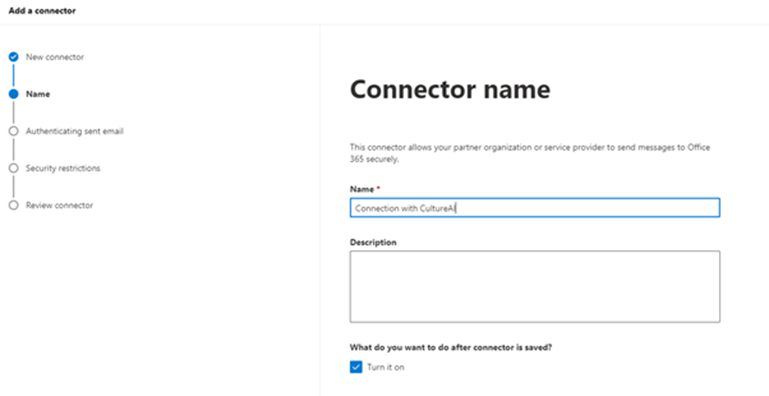
- Leave “Turn it on” enabled.
- Select verify by IP address and enter the following 3 IP addresses:
18.168.112.23
18.169.30.9
18.169.49.67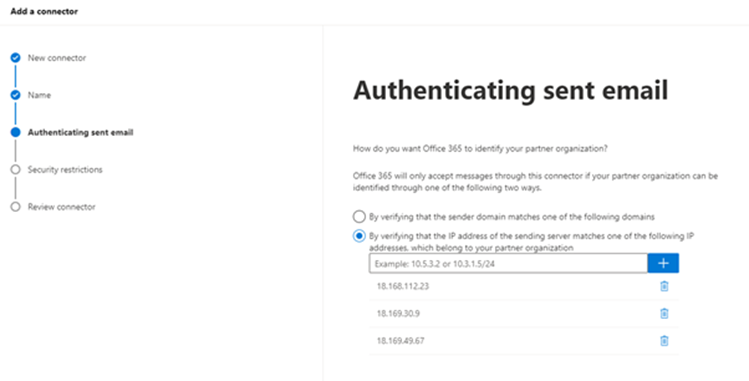
- Leave “Reject email messages if they aren’t sent over TLS” enabled.
- Review and save
Add trust for inbound connector traffic
- Head to the anti-spam policies.
- Select “Connection filter policy (Default)”

- Add the 3 mail server IP's to the allow messages list:
18.168.112.23
18.169.30.9
18.169.49.67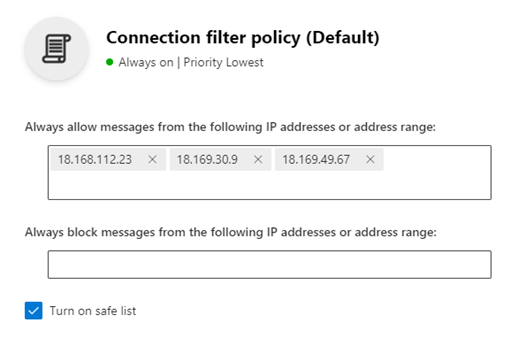
- Review and save
Advanced Phishing Configuration
- Access the Microsoft 365 defender portal and browse to Policies & Rules > Threat Policies > Advanced Delivery > Phishing Simulation
- Add the following IP addresses to the allowed sending IPs:
18.168.112.23
18.169.30.9
18.169.49.67 - Add culture.ai as the sending domain.

- Review and save
Allow-list other CultureAI emails
CultureAI will deliver all emails that are not simulated phishing emails from a different set of IP addresses. Such emails will include welcome emails, case closure notifications and nudges sent via email. This stage of the configuration is to prevent those emails being blocked by Microsoft or filtered as spam.
- Head to the Exchange mail flow rules.
- Select 'Create a new rule'.

- Set the rule conditions as follows:
- 'Apply this rule if' -> 'The sender' -> 'IP address is in any of these ranges or exactly matches'. Add '149.72.233.190' and '149.72.224.180'.
- 'Do the following' -> 'Modify the message properties' -> 'Set the spam confidence level (SCL)'. Select 'Bypass spam filtering'.
- Your rule should look as follows:

- Select 'Next', leave the rule settings as default and select 'Next', then 'Finish'.
- Select your new rule and toggle the 'Enable or disable rule' toggle to 'Enabled'.

Get Domain Settings and apply them in CultureAI
- Head to the Domains section of Microsoft 365 admin centre.
- Select the relevant domain and then 'DNS records'.
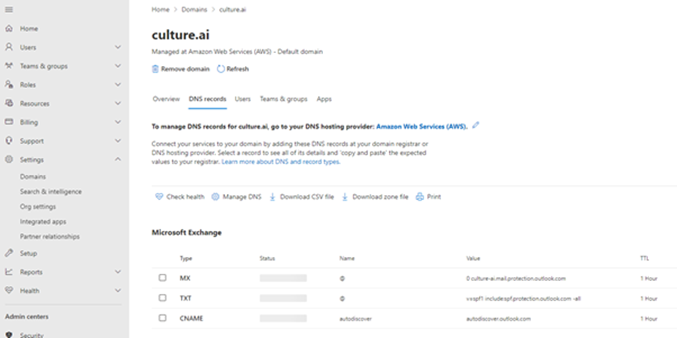
- Copy the MX record value.
This usually ends in "mail.protection.outlook.com" or similar.
If you have multiple MX records, such as Mimecast ones, ensure that you use the Outlook record. Any other record will not work for direct send. - Head to the direct send settings tab in the CultureAI admin dashboard here.
- Enter the MX record into the box.
- Click "Save".
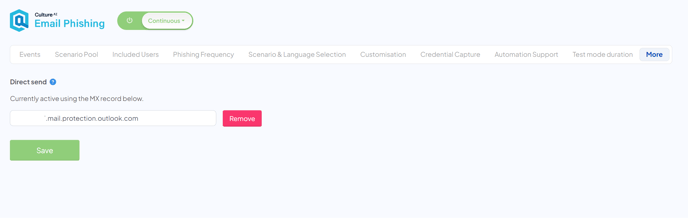
- You're done! Although the change in CultureAI is immediate, the settings in Microsoft can take up to 24 hours to apply, so you may still see emails being blocked until then.